Deploying a Flask Application with Docker on a Raspberry Pi
I have been very frustrated by actual messaging apps. To me, the best way to communicate is to use Internet Relay Chat. It includes all the features I need: multi-channels, private conversation, administration, etc. Unfortunately, for many people, IRC is not user friendly enough or lack many kikoolol(tm) capabilities (such as emojis, which seems to be the ultimate feature for some people).
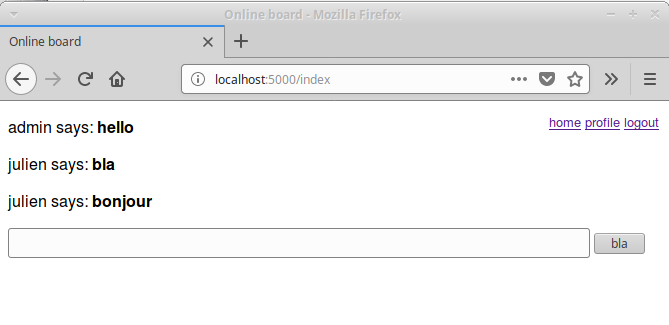
I do not want to use over-killed solutions or have many applications that bother and interrupt me all the time. That was a motivation to implement a very simple message board to exchange messages with friends. The application is very simple: we can have different users, each user can post message. Admins can change password or delete users.
This is how it looks like.
The application relies on the Flask framework and uses a SQLite database to store users/messages information. If you want to use the application and play locally, check the github application page: https://github.com/juli1/flask-chat
This article series explains how to deploy this Flask application on your own server using docker. You can also deploy the same container in AWS, GCP or Azure. Your choice. I just choose my Raspberry Pi because this is a computer that I have at home, I have full control over it and there is an interesting challenge to host a docker image on such a small computer.
This article will explain:
- How to checkout and try the application
- How to build a docker container for it
- How to run the docker container on your local machine
- How to run the docker container on a raspberry pi
The Application
I already wrote the application. This is a simple chat, you can check out the code there: https://github.com/juli1/flask-chat
You can even try it out locally:
git clone https://github.com/juli1/flask-chat.git
cd flask-chat
# Replace the following line with virtualenv if necessary
python3.X -m venv venv # Replace X with your version of python
source flask/bin/activate
pip install -r requirements.txt
./run-debug.py
Then, open your web-browser and go to https://localhost:5000
I also signed up to have continuous integration with travis-ci and code coverage report from coveralls. Just because this is cute to have.
Building the docker image
Now, we need to build a docker image to be able to deploy this everywhere.
The first thing we need is to define a Dockerfile that defines how to build your container.
In the following file, we perform the major following steps:
- install all dependencies (
python3,python3-pip) - copy our app in
/appin the container - install all the python dependencies (specified in
requirements.txt) - create a fresh database
db_create.py - specify the command to execute the application
python3 run-production.py
FROM python:3.6-slim-stretch
MAINTAINER Julien Delange <julien@gunnm.org>
RUN apt-get update -y
RUN apt-get install -y python3 python-pip-whl python3-pip
COPY . /app
WORKDIR /app
RUN pip3 install -r requirements.txt
RUN rm -f app.db
RUN python3 ./db_create.py
EXPOSE 5050
ENTRYPOINT ["python3"]
CMD ["run-production.py"]
Once we are done, we can build the docker image. To do so, just invoke the following command:
docker build -t flask-chat:latest .
Running the docker image on your local machine or on your raspberry pi
Now, it is time to run the docker image freshly built!
If you want to run the image you built on your computer into a docker container, just run:
docker run -d -p 10000:10000 flask-chat
This command run the container and binds the local port 10000 to the container port 5050 (on which the flask application is listening to).
If you just want to use the pre-built image from dockerhub on your local machine, run:
docker run -d -p 10000:10000 juli1/flask-chat:latest
And finally, if you want to run the pre-built image from dockerhub on your raspberry pi, run:
docker run -d -p 10000:5050 juli1/flask-chat:rpi
If you want to actually build the container on your raspberry pi, you can use the Dockerfile.rpi`file
in the root directory of the project like this:
docker build -t flask-chat:latest . -f Dockerfile.rpi
Continuous Integration
We are in 2017 (soon 2018) and continuous deployment/integration is just the way to go. Automating the build of your docker container is very easy - you can just travis-ci or docker do trigger every time there is a commit.
What is more difficult is to build the image for raspberry pi. This tutorial helped a lot. If you want to build your own docker image for raspberry pi, have a look at my the Dockerfile.rpi in the project github directory.
Useful resources
The chat application is available on my github account: https://github.com/juli1/flask-chat
The docker images are on this repository: https://hub.docker.com/r/juli1/flask-chat/
- The docker image for intel is: juli1/flask-chat:latest
- The docker image for raspberry pi is: juli1/flask-chat:rpi
These are some resources I used during my search for information on rust.