Flaskyelp, a simple yelp-like website with Python and Flask
This blog post details the design of a small yelp-like application in Python with Flask.
Background
Some years ago, while working at the European Space Agency, I learned Python and decided to developed some code, mostly for the TASTE project. Back then, I was pretty familiar with the language, the main thing was to get used to a strict indentation code, which took just few hours. Coding mostly in Java for the OSATE modeling platform since 2012, I decided to refresh my Python skills.
The first idea I had then was to code a small website with Python. First, I read again The Hacker’s Guide to Python, a book from an old friend, Julien Danjou, which contains a lot of hacks and tricks for Python.. The second action was to ask him what was a good active framework - as he was more familiar with the Python eco-system, he probably knows better what are the code framework to use. I would then be able to start right away my small website project. He recommended Flask, a popular Python micro-framework.
Introducing Flaskyelp, a small yelp in Python
I decided to code a small Yelp-clone. Nothing fancy, it will be very simple to design: a basic Flask application, no CSS or fancy front-end, no complex model or interaction with SQLAlchemy, just a minimalistic design and a sqlite database. The emphasis was to refresh my python skills and be familiar again with the environment (build system, testing infrastructure, etc.)!
Also, I wanted to share it so that people in a similar situation can get the sources and potentially learn from it. I put the sources on github, which can help you in case you want to start using Flask. It is in fact very easy to use and install. I will go through the basic steps.
Install
You need a working python environment. The tool depend on Flask, so, you need to install it. Otherwise, you can use a virtual environment to install all the dependencies. There is the set of commands that would get you started:
git clone https://github.com/juli1/flaskyelp.git
cd flaskyelp
virtualenv venv
. ./venv/bin/activate
pip install flask
python -m flask initdb
python -m flask run
During this sequence of commands, you checkout the project, install the virtual environment, activate it, install the dependency, initialize the database and run the program.
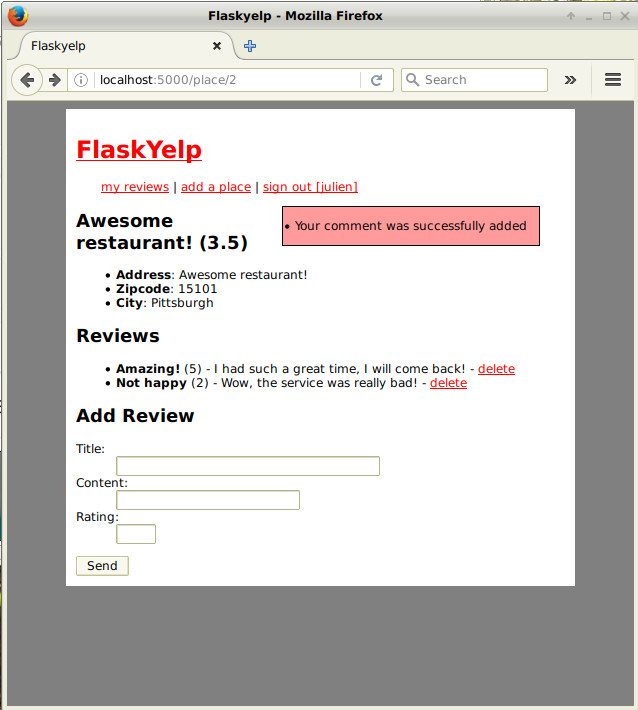
Once the program is running, you can see the result in a browser by going on http://localhost:5000/. You should have something similar as below.
Test it!
I always try to implement test cases for my code, it is essential to make sure you do not break any functionality when you are modifying your code or even trying to implement a new feature! That’s why I wrote some tests to check that the system is behaving as expected! I did not implement a full test-suite but simple test case that checks basic behavior.
In order to test the application, you can run python setup.py test to run them.
You should expect a trace like this.
....
Using /home/julien/git/flaskyelp/.eggs/py-1.4.31-py2.7.egg
running egg_info
writing requirements to flaskyelp.egg-info/requires.txt
writing flaskyelp.egg-info/PKG-INFO
writing top-level names to flaskyelp.egg-info/top_level.txt
writing dependency_links to flaskyelp.egg-info/dependency_links.txt
reading manifest file 'flaskyelp.egg-info/SOURCES.txt'
reading manifest template 'MANIFEST.in'
writing manifest file 'flaskyelp.egg-info/SOURCES.txt'
running build_ext
======================================================= test session starts =======================================================
platform linux2 -- Python 2.7.12+, pytest-3.0.3, py-1.4.31, pluggy-0.4.0
rootdir: /home/julien/git/flaskyelp, inifile:
collected 7 items

tests/test_flaskyelp.py .......

==================================================== 7 passed in 0.22 seconds =====================================================
[julien@akira]/home/julien/git/flaskyelp#
What’s next?
I really enjoy learning Python. The language is well-documented, which makes it easier to learn and use. The next project is to implement a bot for the slack collaboration platform. I expect to be done during the next two weeks. As usual, I will post the code there.