Supporting the UART1 of the BeagleBone Black with seL4/CAmkES
In a nutshell
In this article, I explain how to support UART1 of the Beaglebone Black with seL4 and the CAmkES component approach. I explain how to test the UART1, build a cable, patch the kernel and make your application.
Building your cable
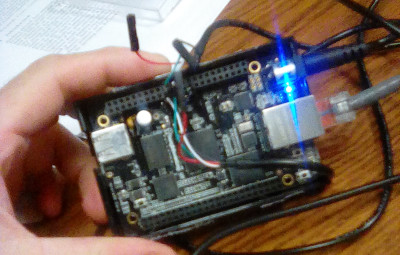
First, you need a cable to connect to the UART1. I (well, the folks at work helped me to get one!) used this USB to TTL serial cable from Adafruit, which worked fine. The white PIN is connected to PIN 24 on the P9 connector board and the green cable is connected to PIN 26 on the P9 connector board.
The picture is ugly but this is how it looks like.
Testing the UART1 interface with Debian
You can use the UART1 interface with the pre-installed debian on the Beaglebone. It already supports UART1 operation. What you need to do is to build a cable, connect on the debian and send some stuff on the port.
The Beaglebone supports what we call a Device Tree Overlay. Long story short, this is a way to change the usage of each PIN. You then have to use the appropriate overlay to use the UART1. The default settings do not work, and you have to issue the following command to enable UART1.
echo ADAFRUIT-UART1 > /sys/devices/bone_capemgr.*/slots
Then, you can connect on the serial and issue whatever you want. Let’s say the UART1 of the Beaglebone Black is connected to /dev/ttyUSB1, you can then connected on screen and type anything.
On your computer, run the following command:
screen /dev/ttyO1 115200
On the Beaglebone Black, run the following command:
screen /dev/ttyUSB1 115200
Type stuff on both screen, you should see what is sent/received.
If it does not work, check your cables and/or the commands you invoked. Let’s move on.
Implementing the kernel side
First, checkout the seL4 and CAmkES repository. When you import the kernel, some stuff are not supported. For example, the UART1 is not declared. You then need to add the definition of UART1 in the kernel.
Edit the file kernel/include/plat/am335x/plat/machine/devices.h and add the following line.
#define UART1_PADDR 0x48022000
Then, in kernel/src/plat/am335x/machine/hardware.c you need to add the support for all UARTs. I found online a nice piece of code that configures all UARTs. I imported it directly into the kernel. You can see the code in my patch.
Implementing the component
So now, the kernel has the information about the UART1 device (UART1_PADDR) and activate the necessary resources to handle it. Now, we need to describe the component using CAmkES and implement its driver in the user-space partition.
CAmkES definition
We define a hardware CAmkES component that represents the UART component and we connect it to the device that is supposed to handle/manage it.
My assembly look like this:
import <std_connector.camkes>;
import "components/timer/Timer.camkes";
import "components/ProducerThreadImpl/ProducerThreadImpl.camkes";
import "components/ConsumerThreadImpl/ConsumerThreadImpl.camkes";

component UART{
  hardware;
  dataport Buf mem;
}

component ConsumerThreadImpl
{
  include "generatedtypes.h";
  control;
  dataport simpletype data_sink;
  consumes sig activator;
  dataport Buf uartmem;
}

assembly
{
  composition
  {
    component Timerbase timerbase;
    component Timer timer;
    component UART drv;

    component ProducerThreadImpl Prod_Pinger;
    component ConsumerThreadImpl Cons_PingMe;

    connection seL4SharedData connection0(from Prod_Pinger.data_source, to Cons_PingMe.data_sink);
    connection seL4Notification notification0 (from timer.Prod_Pinger_activator, to Prod_Pinger.activator);
    connection seL4Notification notification1 (from timer.Cons_PingMe_activator, to Cons_PingMe.activator);
    connection seL4HardwareMMIO uart_mem (from Cons_PingMe.uartmem, to drv.mem);
    connection seL4HardwareMMIO timer_mem (from timer.reg, to timerbase.reg);
    connection seL4HardwareInterrupt timer_irq (from timerbase.irq, to timer.irq);
   }

  configuration
  {
    connection0.from_access = "W";
    connection0.to_access = "R";
    timerbase.reg_attributes = "0x48040000:0x1000";
    timerbase.irq_attributes = 68;
    drv.mem_attributes       = "0x48022000:0x1000";
  }
}
In this declaration, the assembly has two interesting component:
- UART (and its related instance drv) represents the hardware component of the UART. We configure it in the configuration section and its memory area (see drv.mem_attributes = 0x48022000:0x1000). This will then map the address 0x48022000 into the partition in a pointer called uartmem.
- ConsumerThreadImpl represents the component that is using the hardware component. This component will then contain all the code necessary to execute the driver.
There are other artifacts of course, such as the timer and timerbase components that are here to handle the timer and activate periodic tasks. I detailed these aspects before, you can read this post in case you are interested.
The architecture of our CAmkES application is as follow: the producer will send a number that is eventually send through the UART by the Consumer component.

Implementing the driver
Now, we need to implement the driver. As for the kernel, I used a lot of code from this post on the starterware forum. Mostly, the code first initialize the UART1 and send the string “hello” followed by the number received (module 10).
The code of the component looks like this:
int run(void)
{
devmem = (unsigned int) uartmem;
unsigned int UARTparms = 0;
char mybuf[10];
int val;
memset (mybuf, 0, 10);
UartFIFOConfigure(devmem);
UARTparms = 0x3; // p4033 - 8 data bits, 1 stop bit, no parity
UARTsetup(devmem, 115200, UARTparms, UART16x_OPER_MODE);
while (1)
{
activator_wait();
user_ping_spg ((*data_sink) );
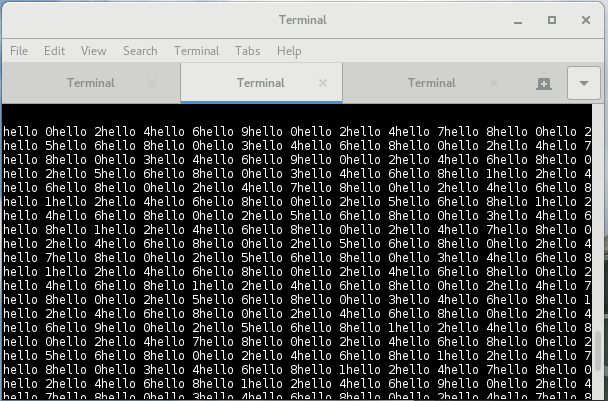
sprintf(mybuf, "hello %d\n", (*data_sink % 10));
UART_tx(devmem, mybuf, 7);
UART_tx(devmem, "hello", 5);
printf ("UART= %d\n", val);
}
return 0;
}
We imported some code to initialize and use UART1. The CAmkES code generator mapped the 0x48022000 address (defines in the CAmkES description for the hardware component) in the uartmem component. We assigned the address of the uartmem variable into devmem. We can then manipulate the device using this address.
The code of other functions (UArtFIFOConfigure and UARTsetup) are included in the zip file containing the full CAmkES application.
Booting the application
Once you compiled the application, you need to boot it! If you do not know how to compile or produce binary files for a CAmkES application that targets the Beaglebone Black, you can read the CAmkES documentation and the seL4 documentation about the Beaglebone.
The beaglebone uses something weird called the Device Tree Overlay. You can get information there. Long story short, this mechanism lets you configure how the PIN of the boards are connected to the AM335x SOC.
We do not need to change everything but still need to activate the UART1. You can do this when booting the board with u-boot. Type the following lines in u-boot:
mw.l 0x44E10980 0x30
mw.l 0x44E10984 0x00
This would be enough. It seems it cannot work in the component itself. On the other hand, as discussed in this post it seems you can avoid that by inserting the following line in platform_init().
*(volatile uint32_t*)0x44E10980 = 0x30;
*(volatile uint32_t*)0x44E10984 = 0x00;
Then, time to load the binary. I used a network connection to do that.
dhcp ${loadaddr} 192.168.1.1:sel4.img

go ${loadaddr}
Then, just issue a cat /dev/ttyUSB1 and voila!. The following picture show what I received from the UART1 of the BeagleBone Black.
Debugging
Sometimes, you need to debug and trace when things are going wrong. You might experience this. I would recommend the seL4 tutorial that provides some useful direction. When having an exception in a partition, the following command is very useful.
arm-none-eabi-objdump -dS /path/to/your/binary | less
In a nutshell, it gives you the assembly code, its address and with the associated C line. So, you can exactly know where to look for when you get the address related to a crash.
For example, when debugging the UART1 driver in the partition, I used this command a lot. Very useful. You might need it!
arm-none-eabi-objdump -dS build/arm/am335x/pingbeagleboneinstance/Cons_PingMe.instance.bin | less
Special thanks
The staff that are working on this project at CMU as well as the seL4 community!
Resources
- Patch for the kernel: available here
- CAmkES application with the driver: available here
- Bare code for UART1 support: discussion on TI forums
- Related thread on the seL4 mailing list